

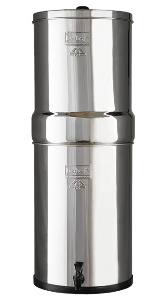


Berkey Filters Quick Start Guide
How to setup a Berkey water filter system.
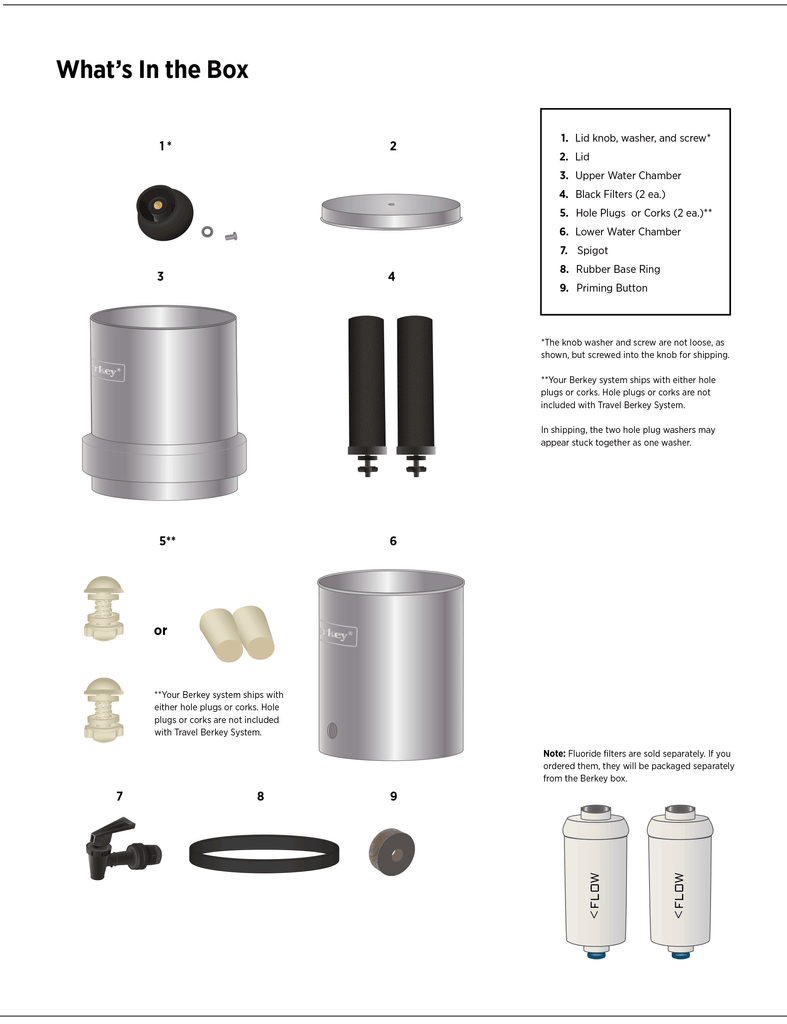
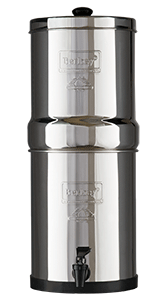
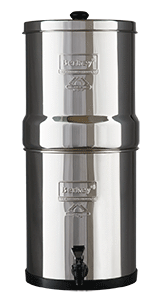
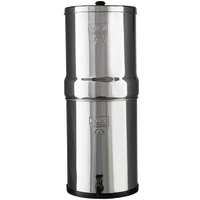
What's in the Box:
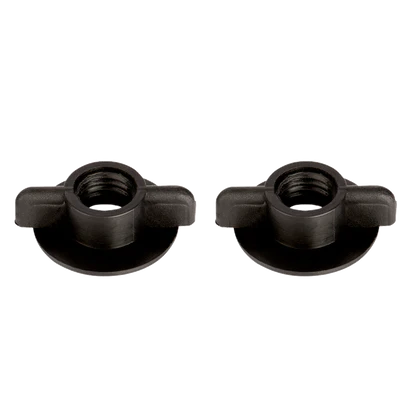
1. Lid knob, washer, and screw
2. Lid
3. Upper water chamber
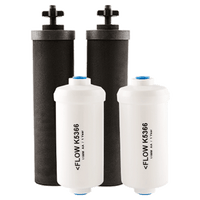
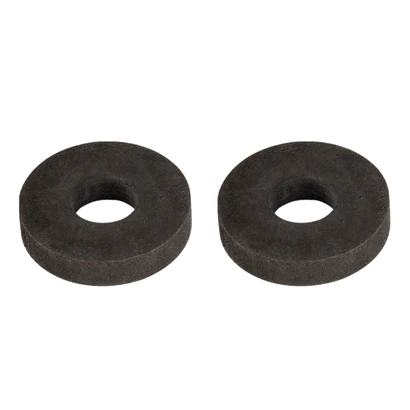
4. Two Black Filters
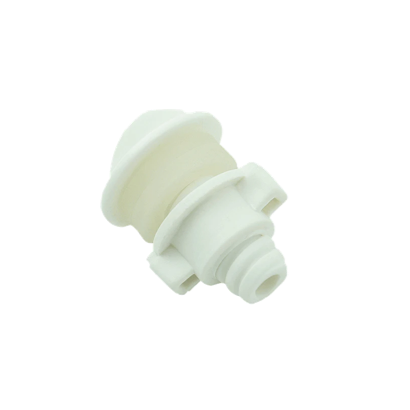
5. Two hole plugs or corks
6. Lower water chamber
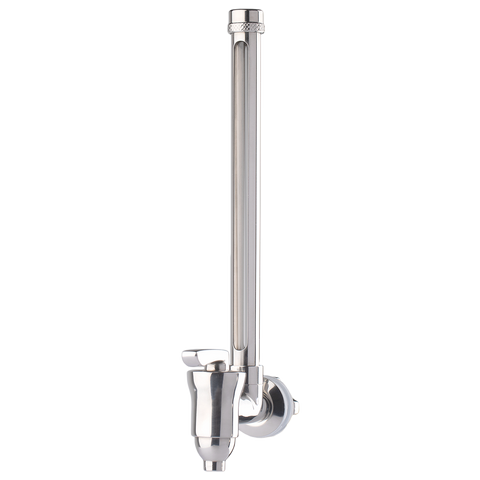
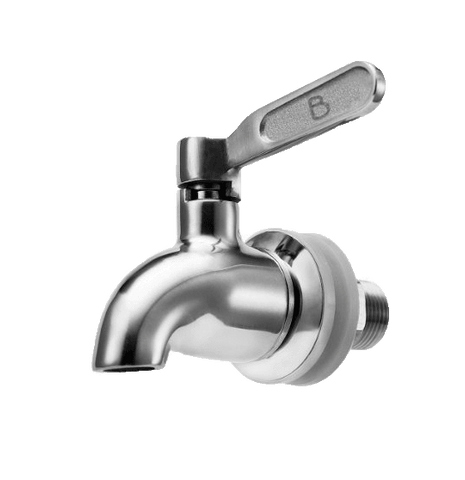
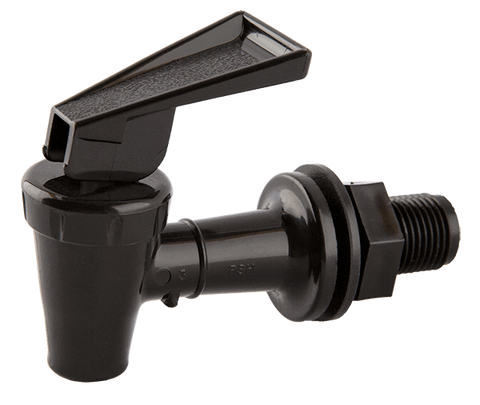
7. Spigot
8. Rubber base ring
9. Priming button
*Fluoride Filters are sold separately.
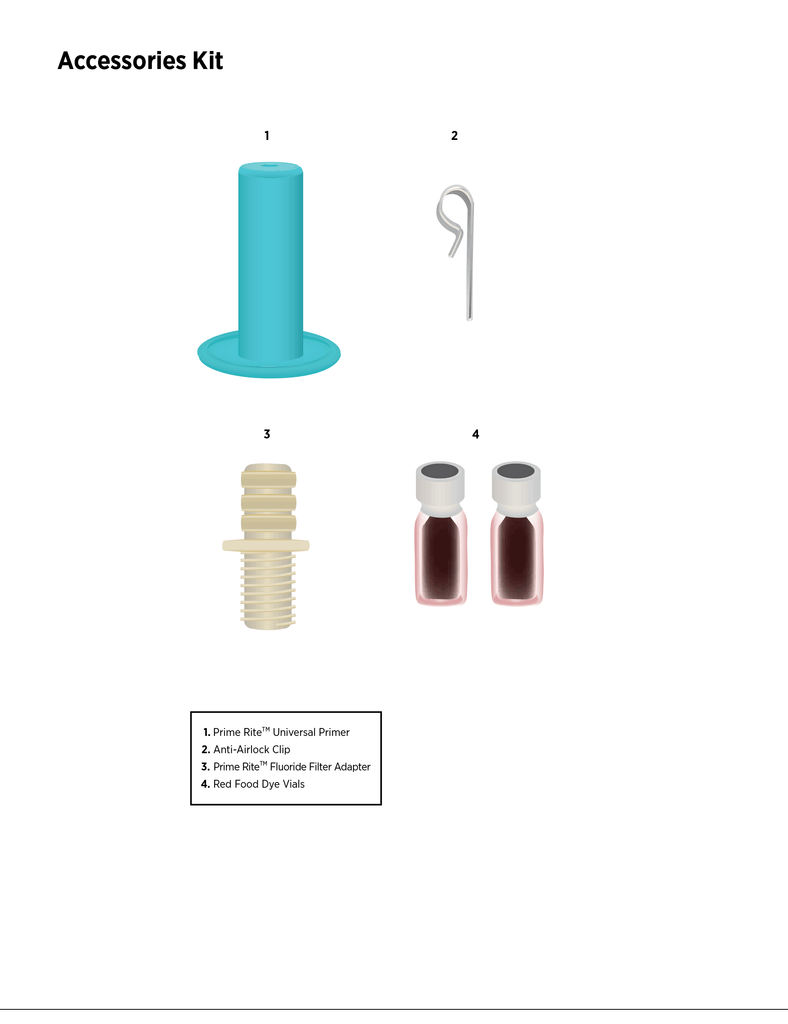
Accessories Kit:
1. Prime Rite Primer
2. Anti-Airlock Clip
3. Prime Rite Fluoride Filter adaptor
4. Two Red Dye Vials
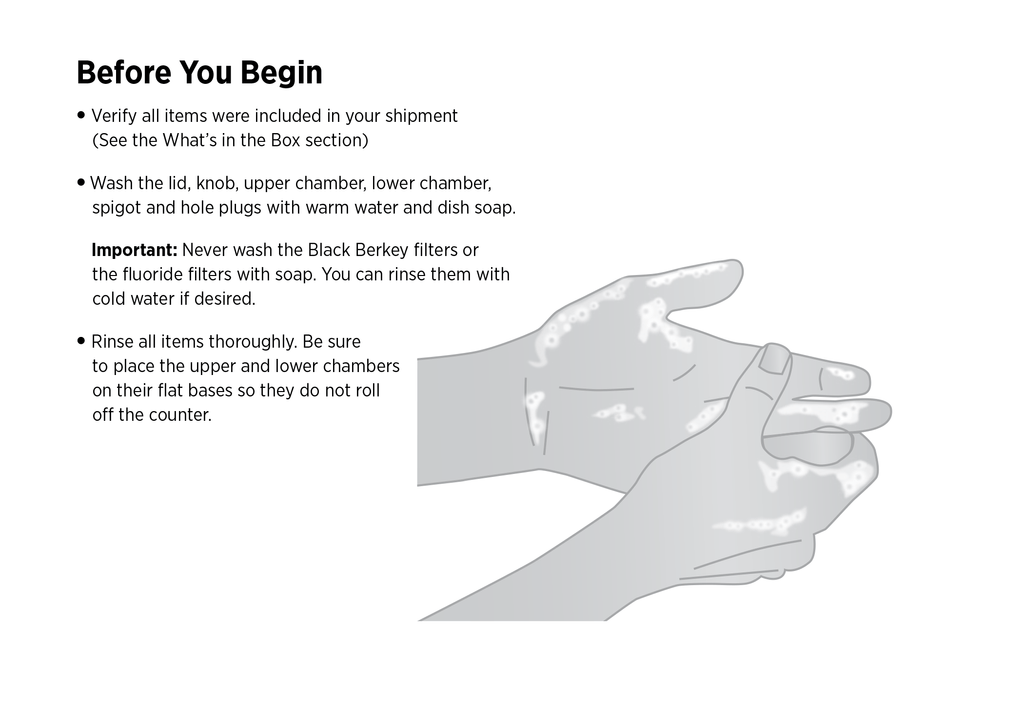
Before You Begin:
1. Verify all items were in your shipment. Check to make sure nothing is missing.
2. Wash the lid, knob, upper and lower chambers, spigot, and hole plugs or corks with warm soaping water.
Do NOT wash the Filters. Only use water to rinse the Black Berkey Filters and/or the Fluoride Filters.
3. Rinse all items thoroughly. Take care to set items so they do not roll and break.
Assemble Your Berkey:
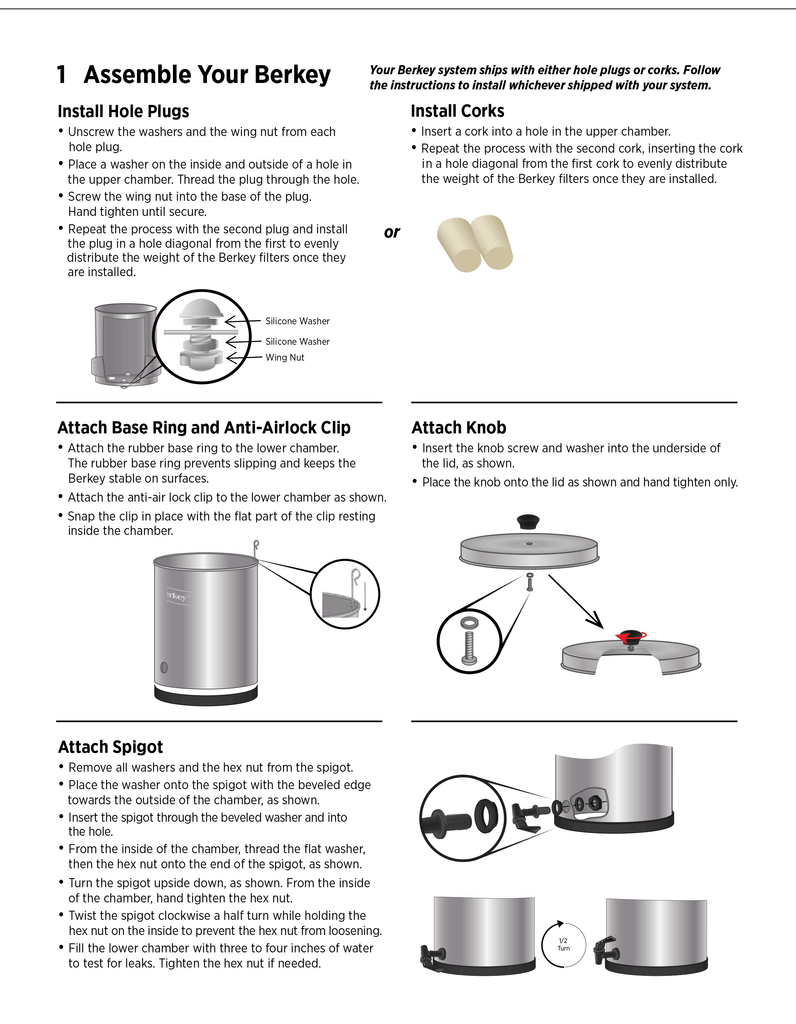
Install Hole Plugs or Corks.
● Unscrew the washers and wing nut from each hole plug.
● Place washer on the inside and outside of a hole in the upper chamber. Thread the plug through the hole.
● Screw the wing nut into the base of the plug. Hand tighten.
● Repeat the process with all the hole plugs. We recommend going in a diagonal pattern to evenly distribute the weight of the filters once they are install.
Insert corks into the holes of the upper chamber. Small or narrow side points down. We recommend going in a diagonal pattern to evenly distribute the weight of the filters once they are install.
Attach Base Ring.
Fit the rubber base ring on the bottom of the lower chamber. This prevents slipping.
Attach Anti-Airlock Clip
Snap the clip onto the rim of the lower chamber, flat-side on the inside.
Attach Knob
● Insert the knob screw and washer into the underside of the lid.
● Place the knob onto the lid. Hand tighten.
Attach Spigot
● Remove all the washers and hex nut from the spigot.
● Place the washer onto the spigot with the beveled edge towards the outside of the chamber.
● Insert the spigot through the beveled washer and into the hole.
● From the inside of the chamber, thread the flat washer, then the hex nut onto the end of the spigot.
● Turn the spigot upside down. From the inside of the chamber hand tighten the hex nut.
● Twist the spigot clockwise half a turn while holding the hex nut on the inside to keep it from loosening.
● Fill the lower chamber with 3-4 inches of water to test for leaks. Hand tighten the hex nut if needed.
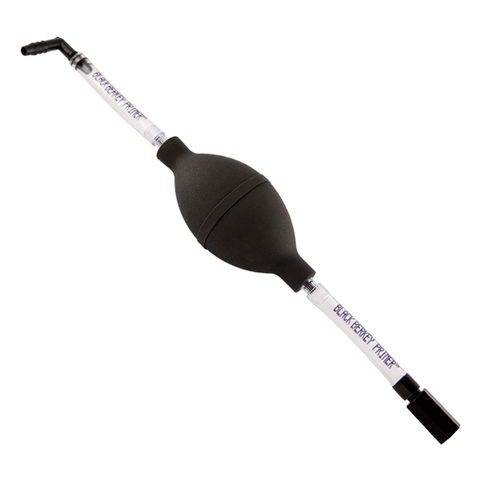
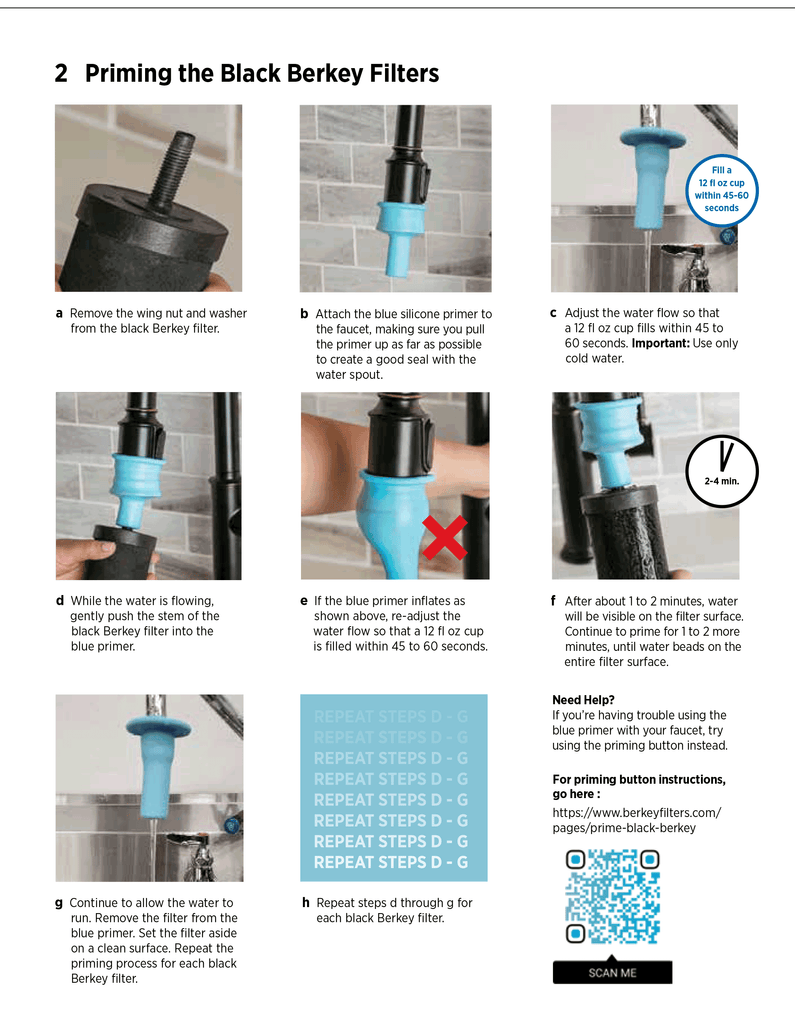
Priming the Filters:
● Remove the wing nut and washer from the filter stem.
● Attach the blue Prime Rite to the faucet, pull it as far as possible.
● Turn the faucet on slowly. Use cold water only.
● While water is running gently push the stem of the filter into the bottom of the Prime Rite.
● If the Prime Rite inflates like a bulb, turn the water pressure down.
● After 1-2 minutes water should be visible on the filter's surface. Let the water run through for 1-2 more minutes until water beads on the entire surface.
● Continue to allow the water to run. remove the filter from the Prime Rite. Set the filter aside. Repeat the priming process for each filter.
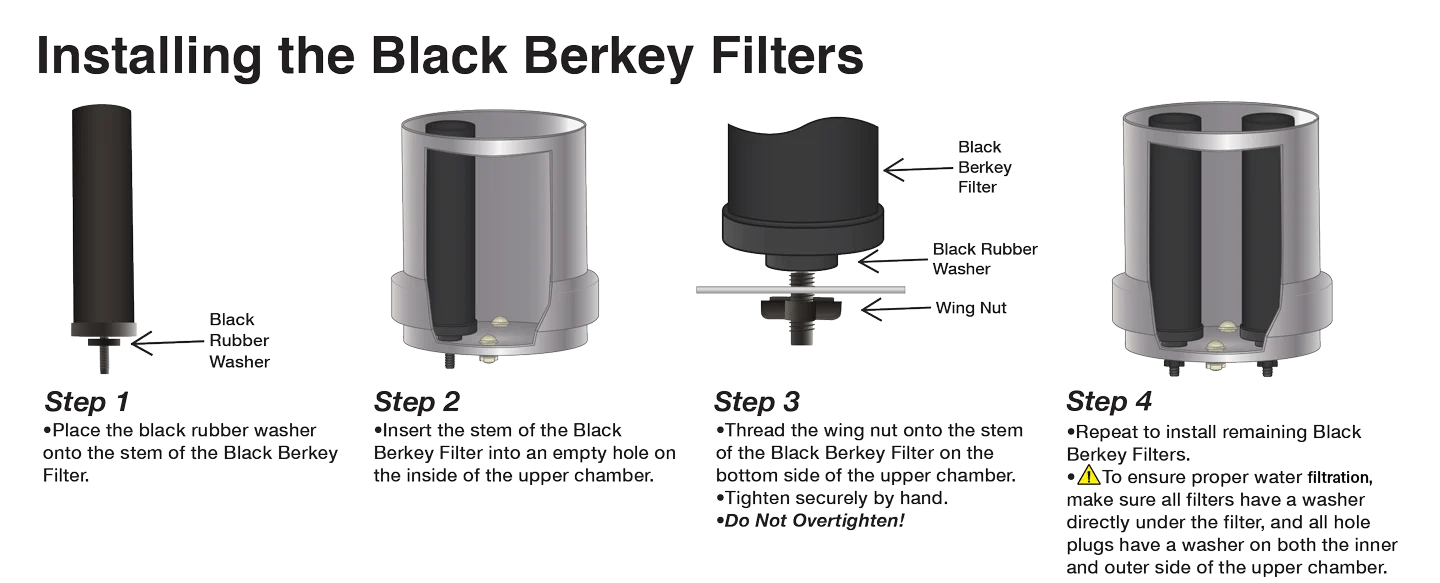
Install Black Berkey Filters:
● Screw the black rubber washer onto the stem of each filter.
● Insert the stem of the filter into an empty hole on the inside of the upper chamber. Repeat for each filter.
● On the outside of the chamber, thread the black wing nut onto the filter stem and hand tighten. Repeat for each filter. Do NOT over-tighten
Make sure all filters have a washer installed between the base of the filter and chamber. Check that hole plugs have a washer on both the inside and outside of the upper chamber.
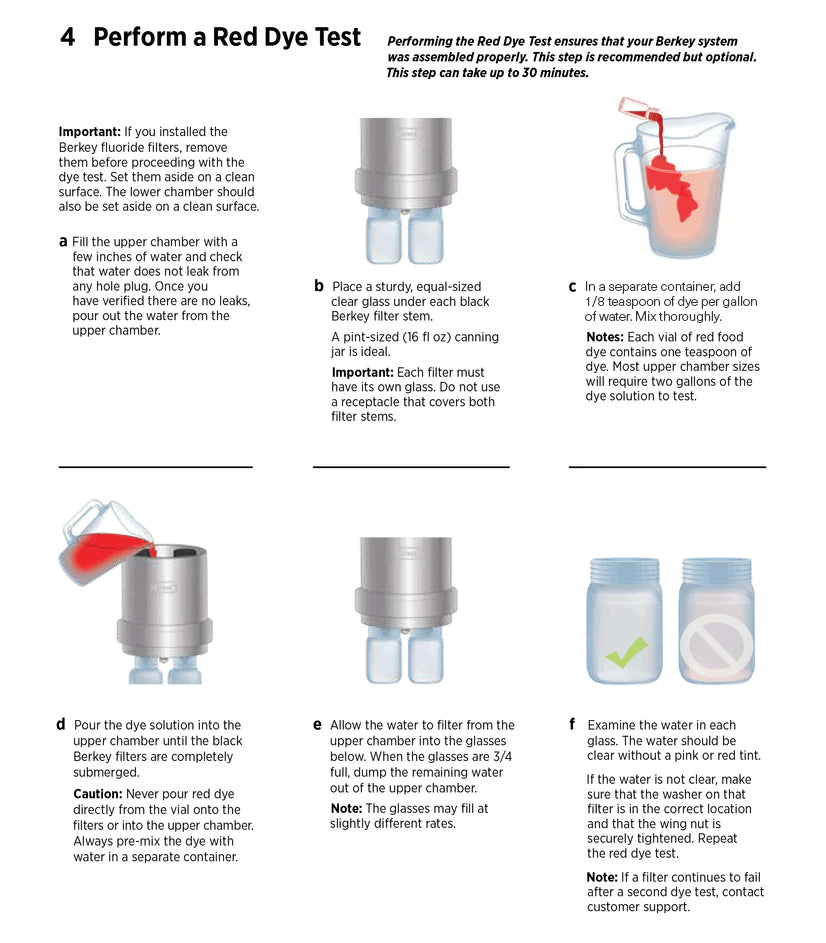
Do the Red Dye Test:
If you have fluoride filters, remove them.
● Fill the upper chamber with a few inches of water to check that no water leaks through the hole plugs.
● Place sturdy, equal-sized clear glasses or jars under each filter stem. Each filter stem must have its own glass.
● In separate container, add one teaspoon per gallon of water. Mix thoroughly.
Each red dye vial holds one teaspoon.
● Pour the dye solution into the upper chamber until the filters are completely submerged.
Never pour the red dye directly onto the filters.
● Allow the water to filter from the upper chamber into the glasses are 3/4 full, dump the remaining water out of the upper chamber.
The glasses may fill at different rates.
● Examine the water in each glass. The water should be clear with out pink or red tint. If the water is not clear, check that the wing nut is correctly and securely tightened. Re-test.
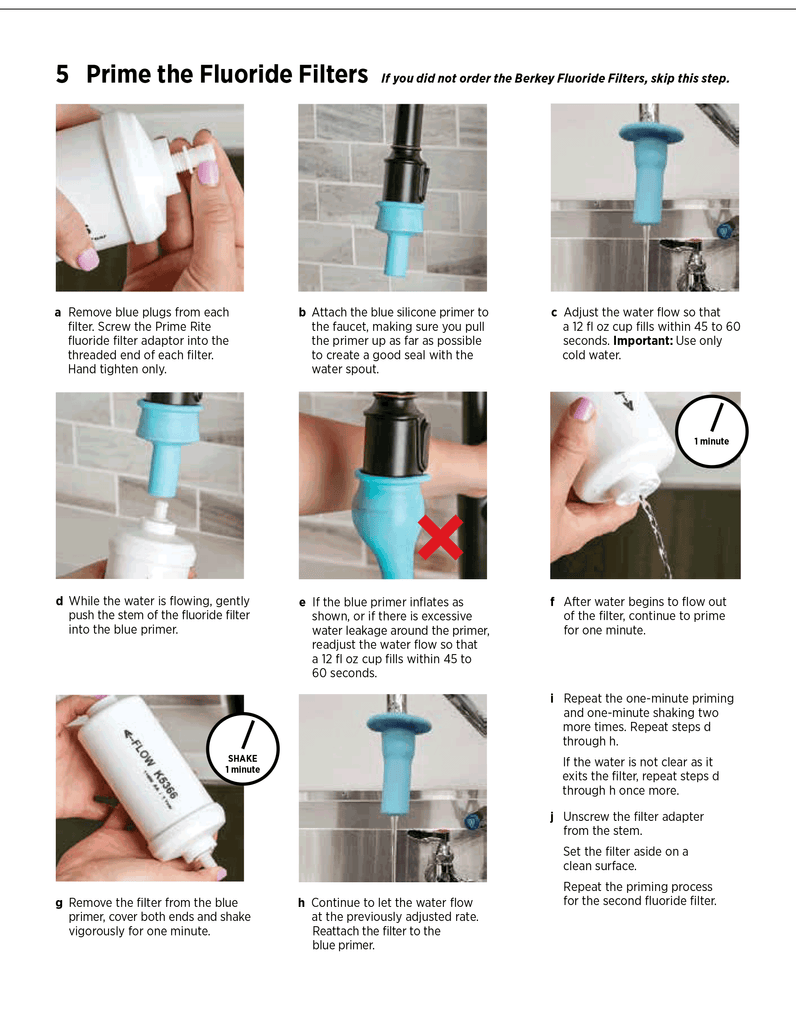
Prime Fluoride Filters:
If you have fluoride filters, here's how to prime.
● Remove the blue plugs from each filter. Screw the Prime Rite fluoride filter adapter into the threaded end of the filter. Hand tighten only.
● Attach the blue silicone primer to the faucet, making sure you pull the primer up as far as possible to create a good seal with the water spout.
● Adjust the water flow so that a 12 fl oz cup fills within 45-60 seconds. Important: Use only cold water.
● While the water is flowing, gently push the stem of the fluoride filter adapter into the blue primer.
● If the blue primer inflates as shown, or if there is excessive water leaking around the primer, readjust the water flow.
● After water begins to flow out of the filter, continue to prime for 1 minute.
● Remove the filter from the blue primer, cover both ends and shake vigorously for one minute.
● Continue to let the water flow at the previously adjusted rate. Reattach the filter to the blue primer.
● Repeat the 1-minute priming and 1-minute shaking two more times. If the water is not clear as it exits the filter repeat the priming and shaking once more.
● Repeat the 1-minute priming and 1-minute shaking two more times. If the water is not clear as it exits the filter repeat the priming and shaking once more.
● Unscrew the filter adapter from the stem. Repeat for all Fluoride Filters to be used.
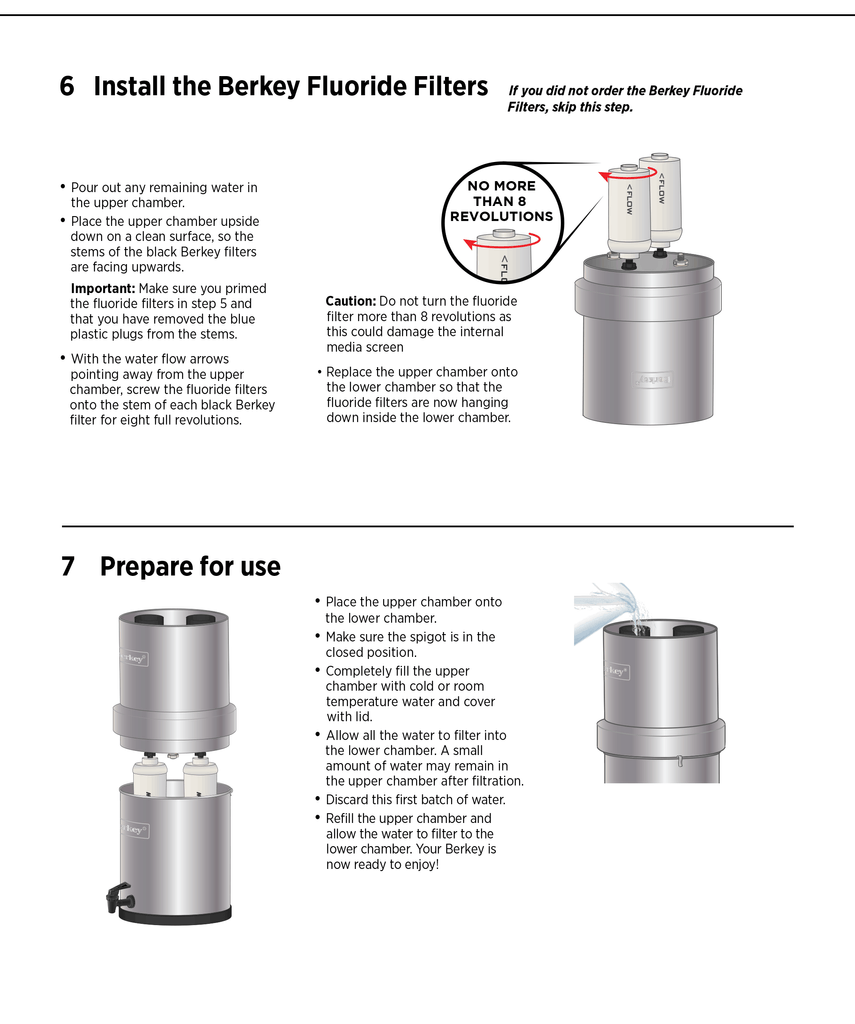
Install Fluoride Filters:
If you have fluoride filters, here's how to install.
● Pour out any remaining water in the upper chamber.
● Place the upper chamber upside down on a clean surface, so the stems of the Black Berkey Filters are facing upward. Important: Make sure you primed the Fluoride Filters and that the blue plugs are removed.
● Screw the Fluoride Filters onto the stem of a Black Berkey Filter for eight revolutions.
Caution: Do not turn the Fluoride Filter more that 8 times because it could damage the internal media screen.
● Place the upper chamber onto the lower chamber so that the Fluoride Filters are now hanging down on the inside of the lower chamber.
Prepare for Use:
● Place the upper chamber onto the lower chamber.
● Make sure the spigot is closed.
● Completely fill the upper chamber with water. Place lid on top.
● Allow all the water to filter into the lower chamber. A small amount of water may remain, which is normal.
● Discard the first batch of water.
● Refill the upper chamber and allow the water to filter into the lower chamber.
You're Berkey is now ready! Enjoy!
More Information
For the full product manual, go here:
www.berkeyfilters.com/pages/berkey-instruction-manuals
For usage tips, go here:
www.berkeyfilters.com/pages/berkey-filters-resources
For maintenance tips, go here:
www.berkeyfilters.com/pages/water-filter-maintenance

